
Laravel is a widely used, useful web app framework to use, but one thing you may notice is it can be a bit complex to set up on production server. I recently set up a small webapp I had been working on for Amateur radio operators (hearham.com), and there are several steps that are not so well documented. If you self host or host on Amazon or Digital Ocean these steps should help you to also get a simple webapp up and running:
- If you haven’t already, get PHP and Nginx running on the server.
- Install Laravel requirements:
sudo apt install php-mbstring php-xml php-bcmath - Set up Mysql:
On Ubuntu 18.04 you can just run “mysql -u root” to get root access to add user and separate database for the laravel application:
CREATE USER ‘laravel’@’localhost’ IDENTIFIED BY ‘somepassword’;
CREATE DATABASE dbname;
GRANT ALL PRIVILEGES ON dbname.* TO ‘laravel’@’localhost’;
FLUSH PRIVILEGES
4.
Set up a pulling key: for deployment – that is, git pulls into production . On the server run:
ssh-keygen -t rsa -b 4096 -C “setup@whateversite.com”
and accept defaults. Run:
cat ~/.ssh/id_rsa.pub
to see your user’s new id and add it to the deployment keys here:
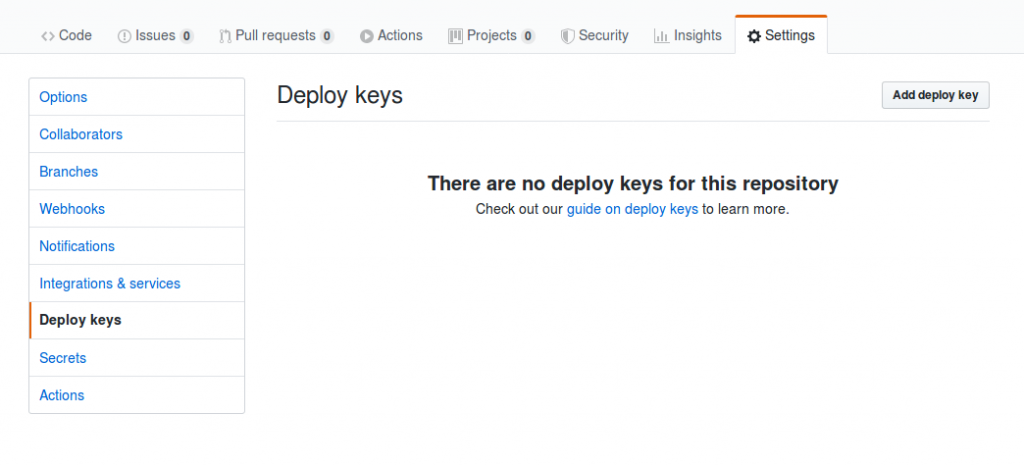
Now you can “git pull”, and run the initial “git clone <privaterepo>” you have on github for backup. This is a great way to have your test code on local setup (running “php artisan serve” for quick testing of features), then git push and “git pull” on the server to deploy the code.
5.
Set up files and .env to connect to database:
composer installIf it gives an error “your PHP version (7.2.24) does not satisfy that requirement” or similar on 18.04, maybe you were on a later version in the test setup? Run:
composer updateIt should pull in working libraries. Copy a new .env with the database credentials made above, and check the production server IS production:
APP_ENV=production
APP_DEBUG=false
If you have no APP_KEY, run:
php artisan key:generateThen, make the database tables:
php artisan migrateIf you get an error, drop the empty tables and set mysql mode for the longer length keys in Laravel’s default migrates.
Set the nginx config:
cd /etc/nginx/sites-available/
nano ./nameofsite
and enter the server “{…” config as in the documentation. Then run:
cd /etc/nginx/sites-enabled
ln -s /etc/nginx/sites-available/nameofsite ./nameofsite
nginx -t
service nginx restart
Checking the config before re-starting. Make sure the laravel directories that it will write are working – if not you will see errors in /var/log/nginx/error.log
chown -R www-data /var/www/your-laravel/storage/
chown -R www-data /var/www/your-laravel/bootstrap/cache/
and the other commands listed in Laravel deployments:
composer install --optimize-autoloader --no-dev
php artisan config:cache
6.
Run the certbot command to set up https and redirecting http->https for best security.
7.
Setting up mail/other environment variables:
When you edit the .env file in the Laravel directory, make sure the values you are adding or changing are not found later in the file or those will overwrite earlier settings in the file!
And that’s it… later updates to the webapp can be done with:
git pull
php artisan cache:clear
php artisan config:clear
In the same directory having the .env and other code files.