In recent years there has been a surge in popularity of Chevrolet vehicles like the Chevrolet Bolt and, coming soon, the Equinox EV. There has also been increased popularity for Linux phones like the Librem phone, but unfortunately there has been no equivalent for the “myChevrolet” app for your own computer or Linux-phone… unless you know where to look.
Thankfully there is a module built for NodeRed, the multi-purpose application for building services and applications. If you have never used it before, NodeRed is a handy multi purpose tool that has a drag and drop interface to program home automation and other projects. You can read more at their website. Surprisingly it can do many things that you would with text-based coding languages like filtering and summing data. This is not the only one, there is also Knime which does machine learning/AI through drag and drop flows – drag and drop coding is not just for kids!?
Installation
I installed this on Ubuntu desktop with the Debian/Raspberry Pi instructions. There are instructions for Windows and other operating systems as well.
One thing I noted while installing was the version of nodeJS needs to be uninstalled then installed with v14 or later (it is 12 by default if you installed it on Ubuntu 22.x): Follow the instructions here. Although NodeRed will run with the default version, the module will only install with newer Node 14+.
Once you have started your NodeRed installation and set up your password-protected local setup, go to http://127.0.0.1:1880 and log in, you should be able to test the editing system, “deploy” then click the button under a trigger to run it.
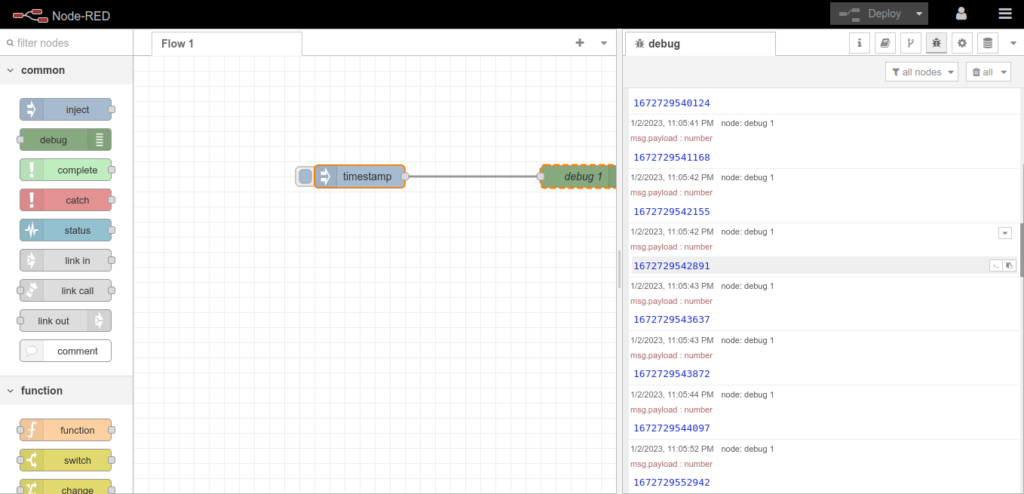
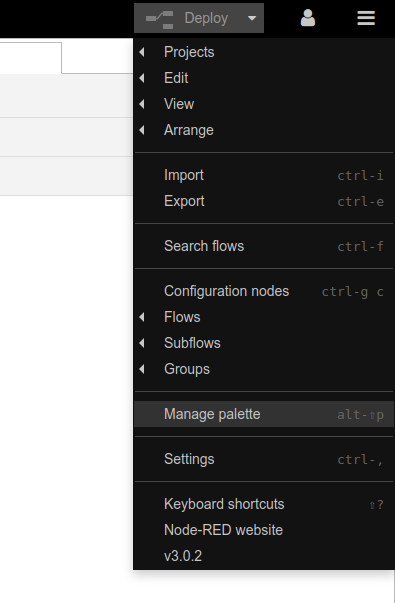
Now that we know NodeRED is up and running, clicking Deploy up top and then the button by trigger triggers a debug log message, one can install the unofficial Onstar connect module from the Manage palette menu:
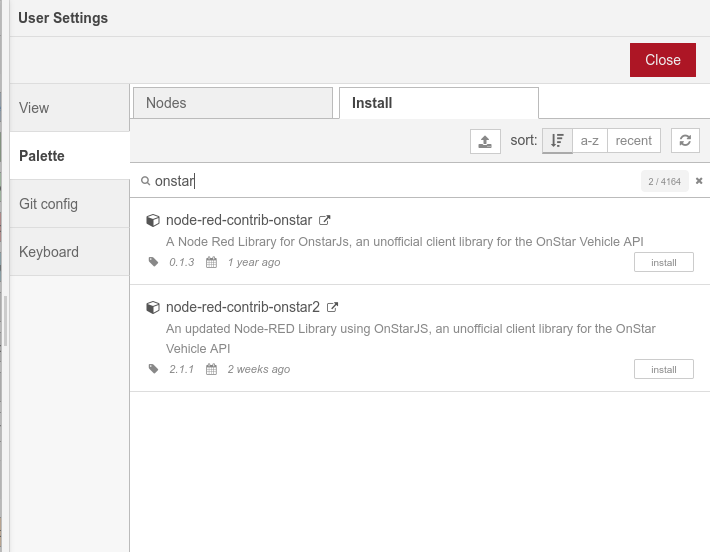
You will probably want the active one, node-red-contrib-onstar2, installed, not the one that has no changes for a year. In fact, if you have older than the recent version 2.1.3 it will not work! In that case you would need to update and then rerun “node-red restart” in the terminal.
Using the Onstar Module
Once installed, you can drag in some Onstar GM modules from the left, add them as actions. For example:
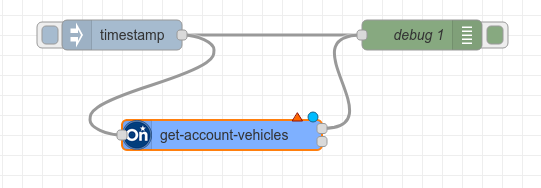
Note that the warning triangle means it has not be fully set up and the blue means it has not redeployed the current build with that node added. Double click an Onstar node to configure it, and add a vehicle configuration for your own vehicle in this area including:
- A uuid in this format (eg 7f5c9295-494c-487e-b9e9-72887065692b)
- Your login for https://www.chevrolet.com/
- The Onstar PIN code you have set.
Note that in the above flow you can click the button next to “timestamp”, triggering the get-account-vehicles manually. You should see one or more vehicles on the account.
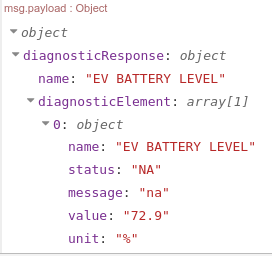
Now in place of the “get-account-vehicles, you can drag in the “lock”, “unlock” and other commands to the flow, as above, and click the trigger to trigger it. If you check a value like “EV Battery Level” in the diagnostics module you can have it output the percent charge, for example: