
If your area has other ham-radio operators that are using an AREDN network, an Ubiquity router is a great way to connect to the local LAN network. Note that you will need:
- An amateur radio license.
- An Ubiquity Nanostation (the “loco” one is cheaper but it has less range 🙁 )
- POE outlet to 2-ethernet adapter (included when you buy a new Nanostation)
- Two ethernet cables (You will want at least one outdoor-rated cable if you will put it outside, which will likely be necessary for good signal.)
Step one – does it connect?
Unlike most any other router you cannot just go to info and enter the “default route” in browser to check out this router. The instruction in the box that say to just use 192.168.1.20 don’t work, it won’t connect (yes, on Linux or Windows). Note that this online quick start guide has correct instructions, but no Linux instructions oddly enough. If you use Ubuntu or others with NetWorkManager status icon it should be quite easy – Go to Edit connections from the option on the wifi/network dropdown or find Network in “System Settings”. Edit the wired connection and make it look like this:
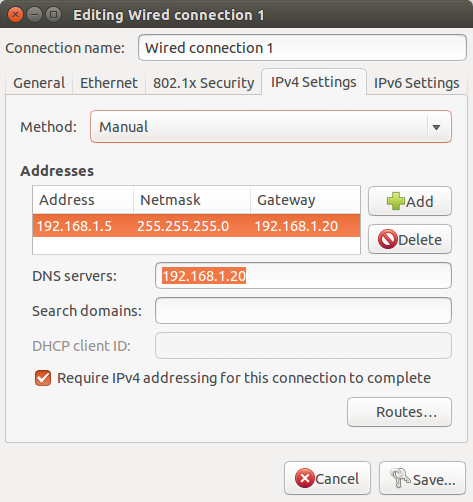
You must plug in directly to it (or, in this case, directly to the POE two-ethernet device.) Plug the power in and plug the POE ethernet to the Ubiquity router, the other ethernet plugs into your computer. If it doesn’t work, unplug, check and save those settings above, plug it back in.
Step two – does it work?
Just like a new Windows computer, it’s good to test functionality of hardware before replacing the operating system for debugging purposes, if you wish you may now go to 192.168.0.20, add temporary exception for its https, and you’ll see the initial screen. Password and username should be “ubnt”.
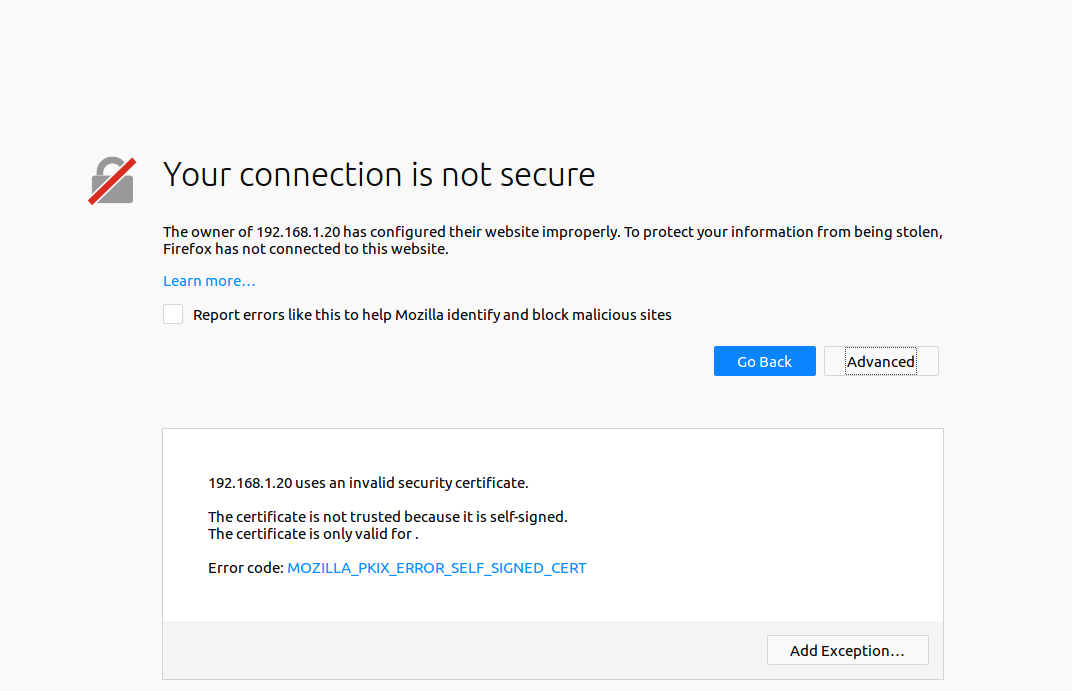
Accept its own certificate here.
Once logged in you can make sure its wifi is working by going to this screen – just below this it will list out nearby wifis:

You may also want to record what Firmware version and build number it has that came with it. Now on to the Aredn install instructions!
Aredn install
Before installing Aredn firmware, make sure you’re on reliable power and you have the correct firmware download file from here. You should also have the tftp command installed:
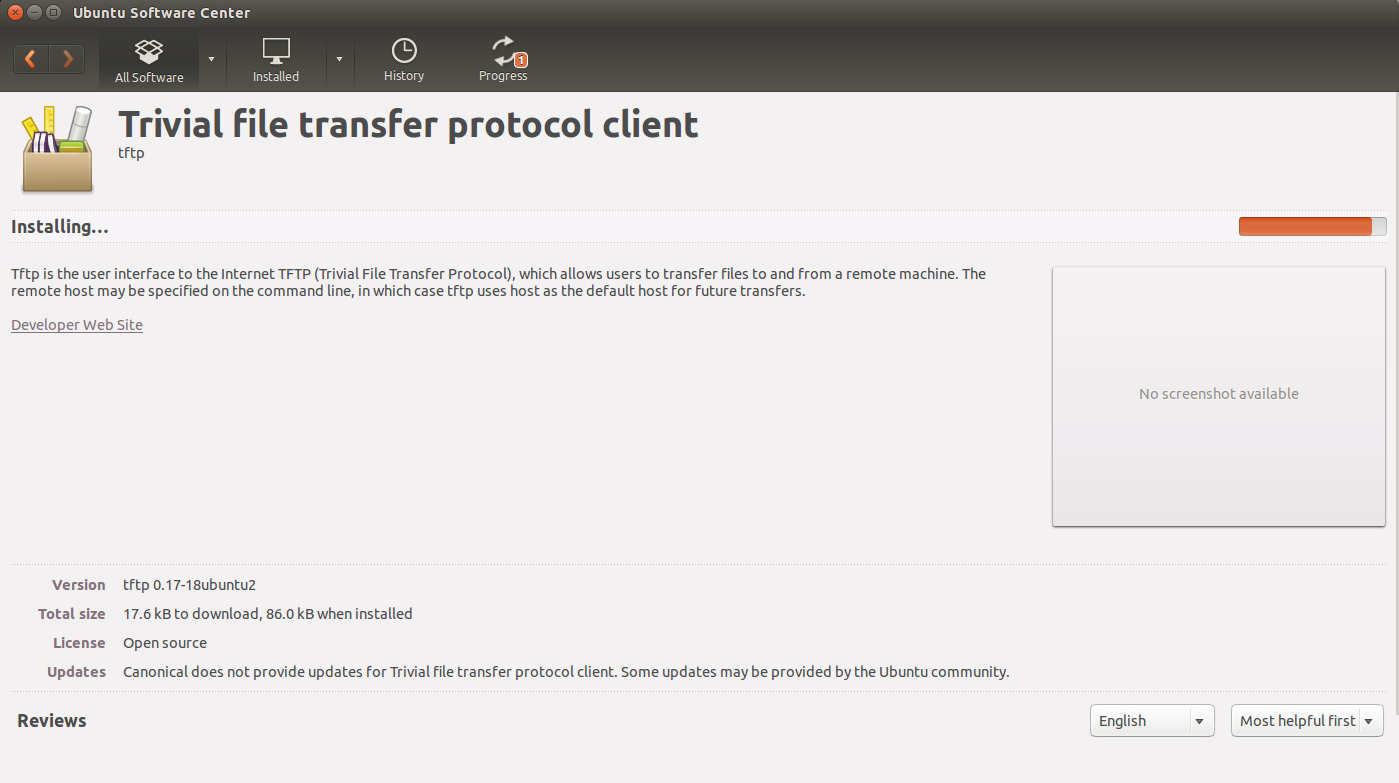
“tftp” command should now open a tftp terminal which you can stop and cancel out of with Ctrl+C, Ctrl+D.
As the instructions state, you should unplug ethernet from your computer, then hold the small reset button (a small screwdriver makes it easy to reach), and hold it. Plug in computer and keep holding reset until it blinks all the led lights, keep holding until it flashes the first and third, then the second and fourth lights. If it doesn’t get to that mode, hold it again and try it again. It should stay in this mode when you’ve got the device into tftp mode.
Double checking and installing the firmware
Note the md5, it’s good to verify this is correct, eg:
cd ~/Downloads md5sum ./aredn-3.18.9.0-ubnt-nano-m-xw-factory.binOutput should be the appropriate md5 on the download page.
The tftp command works similar to ssh, but with fewer, specific commands that relate to the TFTP instead. Install it to the Ubiquity router using:
bin trace on put ./aredn-3.18.9.0-ubnt-nano-m-xw-factory.binNote the “./aredn…” would be the file path you just entered into md5sum (path) above. If you get an error – Firmware check failed:
received ACK <block=11518> sent DATA <block=11519, 512="" bytes=""> received ACK <block=11519> sent DATA <block=11520, 512="" bytes=""> received ACK <block=11520> sent DATA <block=11521, 412="" bytes=""> received ERROR <code=2, msg="Firmware" check="" failed=""> Error code 2: Firmware check failed Sent 5898240 bytes in 2.3 secondsIt probably means you have the wrong firmware you’re trying. Look over the download page again – if you have the NanoStation M2, maybe it is the NanoStation M2 (XW) that you see scrolled down the page. Quickly grab that file and upload, while connected to it! When it succeeds you should see:
Sent 5898652 bytes in 25.2 secondswith no error – wait a few minutes until all the blinking is finished and the device has installed the firmware! There’s one important step to go to get to the Aredn setup screen – the odd 192.168.1.20 specific address setting at the top of the post is not necessary – simply add a new “Ethernet” connection type or set the one you changed back to “Automatic”. Now you should be able to access the setup screen when reconnected to Ethernet, by going to http://localnode.local.mesh:8080 or the ip of the node.
Last but not least, make sure once you are logged in to the device, you set the correct settings – frequency, bandwidth, distance… in the settings, click save and restart to apply. You should now be able to connect to other Amateur radio network nodes.