If you’ve seen any behind-the-scenes view of any movie you probably are familiar with the green-screen – generally a way to combine an actor with some prerecorded or computer generated background. There are some unique effects you can do with this yourself using OpenCV!
Droste Effect
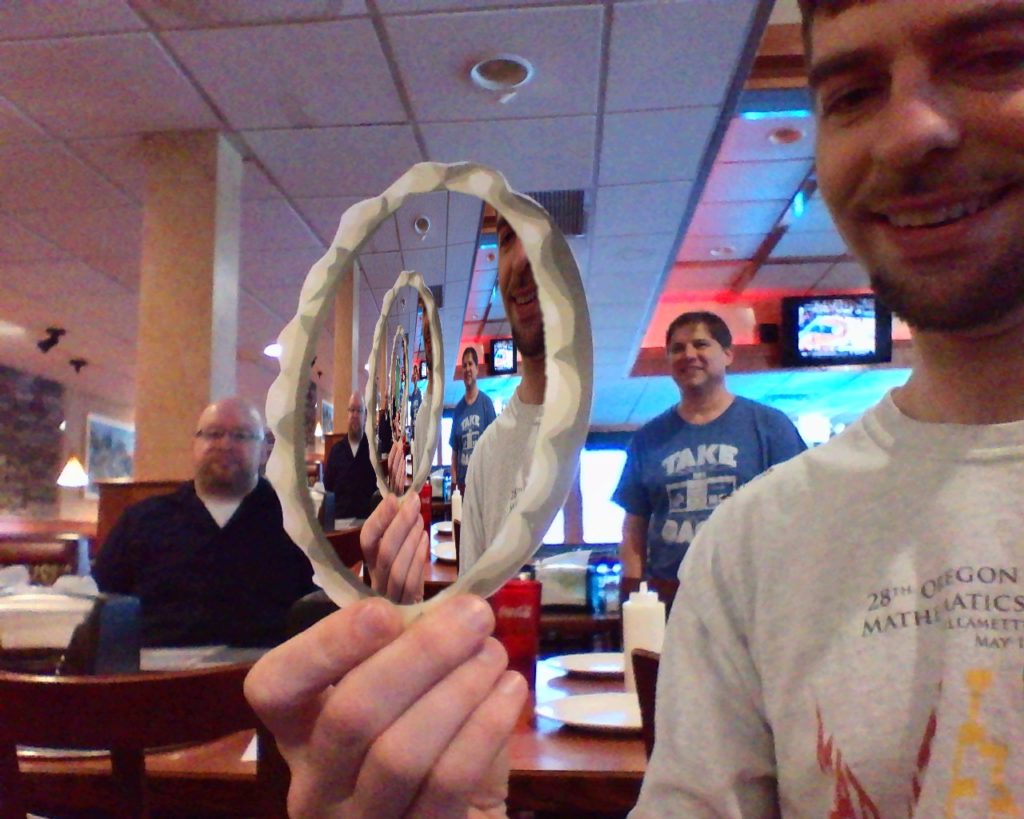
There is a certain type of trick that is related to this- where an image itself is placed in to another, like a group picture of a group holding their group picture holding their group picture… Perhaps the most well known example is the classic Droste cocoa “Droste effect”, where the featured nun has a plate of cocoa and the can featuring her own photo on the can.
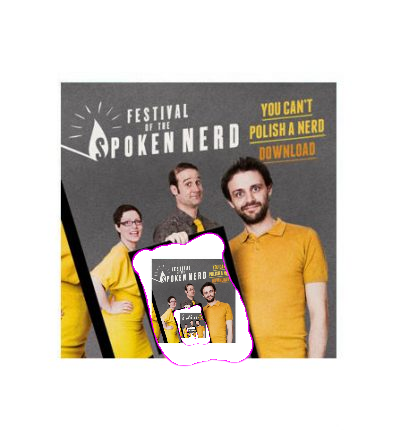
In famous standup mathematician Matt Parker’s video, You Can’t Polish A Nerd, he talks about this effect and shows a similar type of recursive effect which you can see on the DVD cover: Perhaps we can do a similar effect programmatically with computer image/vision libraries?
First try – PIL
PIL (Python Image Library) has been used to build a Droste effect image – in the chapter documented here, they set a specific color to replace (magenta in this example). This is replaced with the whole image, and unfortunately is built in such a way that it can only take .PNG lossless image and only one color, exactly. When I draw a magenta portion around the frame it shows not exactly what one would expect: odd off white magenta is the aliased border of the image. This would not work well with camera input or other inputs!
I modified the example code to output the increasingly smaller image within an image, but when trying to do something similar to Parker’s promo image this doesn’t quite work out:
#!/usr/bin/env python
from PIL import Image

def makeDroste(baseImage, stopAfter=10):
    # If baseImage is a string of an image filename, load that image:
    if isinstance(baseImage, str):
        baseImage = Image.open(baseImage)
    print(stopAfter);
    if stopAfter == 0:
        # BASE CASE
        return baseImage
    # The magenta color has max red/blue/alpha, zero green:
    if baseImage.mode == 'RGBA':
        magentaColor = (255, 0, 255, 255)
    elif baseImage.mode == 'RGB':
        magentaColor = (255, 0, 255)

    # Find the dimensions of the base image and its magenta area:
    baseImageWidth, baseImageHeight = baseImage.size
    magentaLeft = None
    magentaRight = None
    magentaTop = None
    magentaBottom = None

    for x in range(baseImageWidth):
        for y in range(baseImageHeight):
            if baseImage.getpixel((x, y)) == magentaColor:
                #print((x,y))
                if magentaLeft is None or x < magentaLeft:
                    print(magentaLeft)
                    magentaLeft = x
                    print('now set'+str(magentaLeft))
                if magentaRight is None or x > magentaRight:
                    magentaRight = x
                if magentaTop is None or y < magentaTop:
                    magentaTop = y
                if magentaBottom is None or y > magentaBottom:
                    magentaBottom = y

    print(magentaLeft)
    if magentaLeft is None:
        print('no magenta')
        # BASE CASE - No magenta pixels are in the image.
        return baseImage

    # Get a resized version of the base image:
    magentaWidth = magentaRight - magentaLeft + 1
    magentaHeight = magentaBottom - magentaTop + 1
    baseImageAspectRatio = baseImageWidth / baseImageHeight
    magentaAspectRatio = magentaWidth / magentaHeight


    if baseImageAspectRatio < magentaAspectRatio:
        # Make the resized width match the width of the magenta area:
        widthRatio = magentaWidth / baseImageWidth
        resizedImage = baseImage.resize((magentaWidth,
        int(baseImageHeight * widthRatio) + 1), Image.NEAREST)
        print(((magentaWidth,
        int(baseImageHeight * widthRatio) + 1)))

    else:
        # Make the resized height match the height of the magenta area:
        heightRatio =  magentaHeight / baseImageHeight
        resizedImage = baseImage.resize((int(baseImageWidth *
        heightRatio) + 1, magentaHeight), Image.NEAREST)
        print((int(baseImageWidth *
        heightRatio) + 1, magentaHeight), Image.NEAREST)

    # Replace the magenta pixels with the smaller, resized image:
    for x in range(magentaLeft, magentaRight + 1):
        for y in range(magentaTop, magentaBottom + 1):
            if baseImage.getpixel((x, y)) == magentaColor:
                pix = resizedImage.getpixel((x - magentaLeft, y - magentaTop))
                baseImage.putpixel((x, y), pix)

    # RECURSIVE CASE:
    return makeDroste(baseImage, stopAfter=stopAfter - 1)


recursiveImage = makeDroste('PolishANerd.png')
recursiveImage.save('polish.png')
recursiveImage.show()
Failed border recursion
As you can see, the magenta marked area has a magenta ring around it as the aliased tool brush turns it to the outside color. To make this better let’s use some better OpenCV threshold tools…
OpenCV input and threshold
In any greenscreen example or video you’ll need some sort of threshold – by Threshold, this is similar to the Gimp Color menu -> Threshold you may have used to make a simply black OR white pixel image:
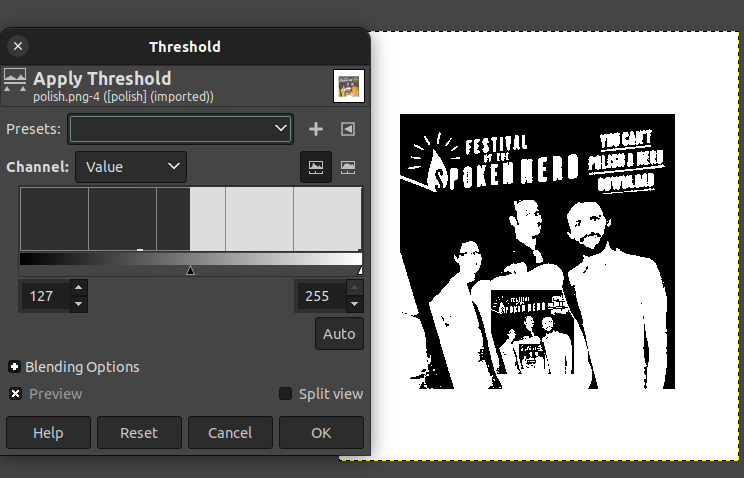
Turning an image to ones and zeroes is a good way to separate and mark out one part of the image… so let’s see what we can do using video input and threshold function… Starting with the OpenCV example we can modify it to make a black and white mask based on Hue/Saturation/Value threshold as described here.
import numpy as np
import cv2 as cv
cap = cv.VideoCapture(0)
if not cap.isOpened():
    print("Cannot open camera")
    exit()
while True:
    # Capture frame-by-frame
    ret, frame = cap.read()
    # if frame is read correctly ret is True
    if not ret:
        print("Can't receive frame (stream end?). Exiting ...")
        break
    # Our operations on the frame come here
    hsv = cv.cvtColor(frame, cv.COLOR_BGR2HSV)
    mask = cv.inRange(hsv, (36, 2, 2), (70, 255,255))

    # Display the resulting frame
    cv.imshow('frame', mask)
    if cv.waitKey(1) == ord('q'):
        break
# When everything done, release the capture
cap.release()
cv.destroyAllWindows()
Run this and you should see all dark areas except for green areas in white.
Separating and recursing the green area.
Now that we have a mask, we can overlay the green portion with the full image: Starting with the code here I adjusted the mask to matching the full image:
def overlay_image_alpha(img, img_overlay, x, y, alpha_mask):
    """https://stackoverflow.com/a/45118011/778234
    Overlay `img_overlay` onto `img` at (x, y) and blend using `alpha_mask`.

    `alpha_mask` must have same HxW as `img_overlay` and values in range [0, 1].
    """
    # Image ranges
    y1, y2 = max(0, y), min(img.shape[0], y + img_overlay.shape[0])
    x1, x2 = max(0, x), min(img.shape[1], x + img_overlay.shape[1])

    # Overlay ranges
    y1o, y2o = max(0, -y), min(img_overlay.shape[0], img.shape[0] - y)
    x1o, x2o = max(0, -x), min(img_overlay.shape[1], img.shape[1] - x)

    # Exit if nothing to do
    if y1 >= y2 or x1 >= x2 or y1o >= y2o or x1o >= x2o:
        print('earlyexit')
        return

    # Blend overlay within the determined ranges
    img_crop = img[y1:y2, x1:x2]
    img_overlay_crop = img_overlay[y1o:y2o, x1o:x2o]
    alpha = alpha_mask[y1:y2, x1:x2, np.newaxis]
    alpha_inv = 1.0 - alpha
    print(alpha.shape)
    print(img_overlay.shape)

    img_crop[:] = alpha * img_overlay_crop + alpha_inv * img_crop
which can combine the image, downsized, into the largest green area with
smallimg = cv.resize(frame, (w,h))
overlay_image_alpha(frame, smallimg, x, y, mask/255)
Note the normal 0-255 value of the mask (black/white image) is turned to 0-1 range dividing 255. Putting it all together and running this green replacement twice, give the following code:
import numpy as np
import cv2 as cv
major_number = cv.__version__[0]

def overlay_image_alpha(img, img_overlay, x, y, alpha_mask):
    """https://stackoverflow.com/a/45118011/778234
    Overlay `img_overlay` onto `img` at (x, y) and blend using `alpha_mask`.

    `alpha_mask` must have same HxW as `img_overlay` and values in range [0, 1].
    """
    # Image ranges
    y1, y2 = max(0, y), min(img.shape[0], y + img_overlay.shape[0])
    x1, x2 = max(0, x), min(img.shape[1], x + img_overlay.shape[1])

    # Overlay ranges
    y1o, y2o = max(0, -y), min(img_overlay.shape[0], img.shape[0] - y)
    x1o, x2o = max(0, -x), min(img_overlay.shape[1], img.shape[1] - x)

    # Exit if nothing to do
    if y1 >= y2 or x1 >= x2 or y1o >= y2o or x1o >= x2o:
        print('earlyexit')
        return

    # Blend overlay within the determined ranges
    img_crop = img[y1:y2, x1:x2]
    img_overlay_crop = img_overlay[y1o:y2o, x1o:x2o]
    alpha = alpha_mask[y1:y2, x1:x2, np.newaxis]
    alpha_inv = 1.0 - alpha
    print(alpha.shape)
    print(img_overlay.shape)

    img_crop[:] = alpha * img_overlay_crop + alpha_inv * img_crop
    #debugging -
    #img_crop[:] =  alpha*222 # img_crop #img_overlay_crop *alpha #+

cap = cv.VideoCapture(0)
if not cap.isOpened():
    print("Cannot open camera")
    exit()
while True:
    # Capture frame-by-frame
    ret, frame = cap.read()
    # if frame is read correctly ret is True
    if not ret:
        print("Can't receive frame (stream end?). Exiting ...")
        break


    # Our operations on the frame come here
    hsv = cv.cvtColor(frame, cv.COLOR_BGR2HSV)
    mingreen = (40, 0, 0)
    maxgreen = (95, 255,255)
    mask = cv.inRange(hsv, mingreen, maxgreen)
    mask = cv.GaussianBlur(mask,(5,5),cv.BORDER_DEFAULT)
    #Get contour of the object, dimensions:
    #ret,thresh = cv.threshold(mask,127,255,0)
    if major_number == '4':
        contours, hierarchy = cv.findContours(mask, cv.RETR_TREE, cv.CHAIN_APPROX_SIMPLE)
    elif major_number == '3':
        img, contours, hierarchy = cv.findContours(mask, cv.RETR_TREE, cv.CHAIN_APPROX_SIMPLE)


    area = 0
    largearea = False
    for cnt in contours:
        x,y,w,h = cv.boundingRect(cnt)
        if( w*h > area ):
            area = w*h
            largearea = cnt
    if not largearea is False:
        x,y,w,h = cv.boundingRect(largearea)
        print(x,y,w,h)
        rect = cv.minAreaRect(largearea)
        box = cv.boxPoints(rect)
        box = np.int0(box)
        #Draw the biggest green area as a box on the original frame:
        cv.drawContours(frame,[box],0,(0,0,255),2)

        smallimg = cv.resize(frame, (w,h))
        overlay_image_alpha(frame, smallimg, x, y, mask/255)
        #again:
        hsv = cv.cvtColor(frame, cv.COLOR_BGR2HSV)
        mingreen = (40, 0, 0)
        maxgreen = (95, 255,255)
        mask = cv.inRange(hsv, mingreen, maxgreen)
        contours, hierarchy = cv.findContours(mask, cv.RETR_TREE, cv.CHAIN_APPROX_SIMPLE)
        largearea = False
        area = 0
        for cnt in contours:
            x,y,w,h = cv.boundingRect(cnt)
            if( w*h > area ):
                area = w*h
                largearea = cnt
        if not largearea is False:
            x,y,w,h = cv.boundingRect(largearea)
            smallimg = cv.resize(frame, (w,h))
            overlay_image_alpha(frame, smallimg, x, y, mask/255)


    else:
        print('No green area?')

    # Display the resulting frame
    cv.imshow('frame', frame)
    if cv.waitKey(1) == ord('q'):
        break
# When everything done, release the capture
cap.release()
cv.destroyAllWindows()
Capturing a picture
Now while you are enjoying the picture-of-a-picture with a green square, or celebrating Pi day (March 14) with a green colored pie (better your face recursively in a pie than a pie in the face 🙂 ), you may want to capture an image output. The Opencv demos quit on pressing the q key, and you can add checks for another in the loop to output to a file:
    key = cv.waitKey(1)
    if key == ord('q'):
        break
    if key == ord('c'):
        from datetime import datetime
        now = datetime.now()
        cv.imwrite(now.strftime("%m-%d-%Y %H:%M:%S.jpg"), frame)
Replace the waitKey if loop with the above (note that it should only be called once per loop), then you will be able to press c to capture an image to the working directory, and q to quit the program!
Pi Day Pie
Print this out and use it with the above program – you can have your face in a pie, better than a pie in the face!
This might do well for St Patrick’s day, as this will have a similar effect with anyone wearing green!